Data Import
After having defined an import type, which defines the structure and property of data, there are different ways to import data in the system.
Single file import
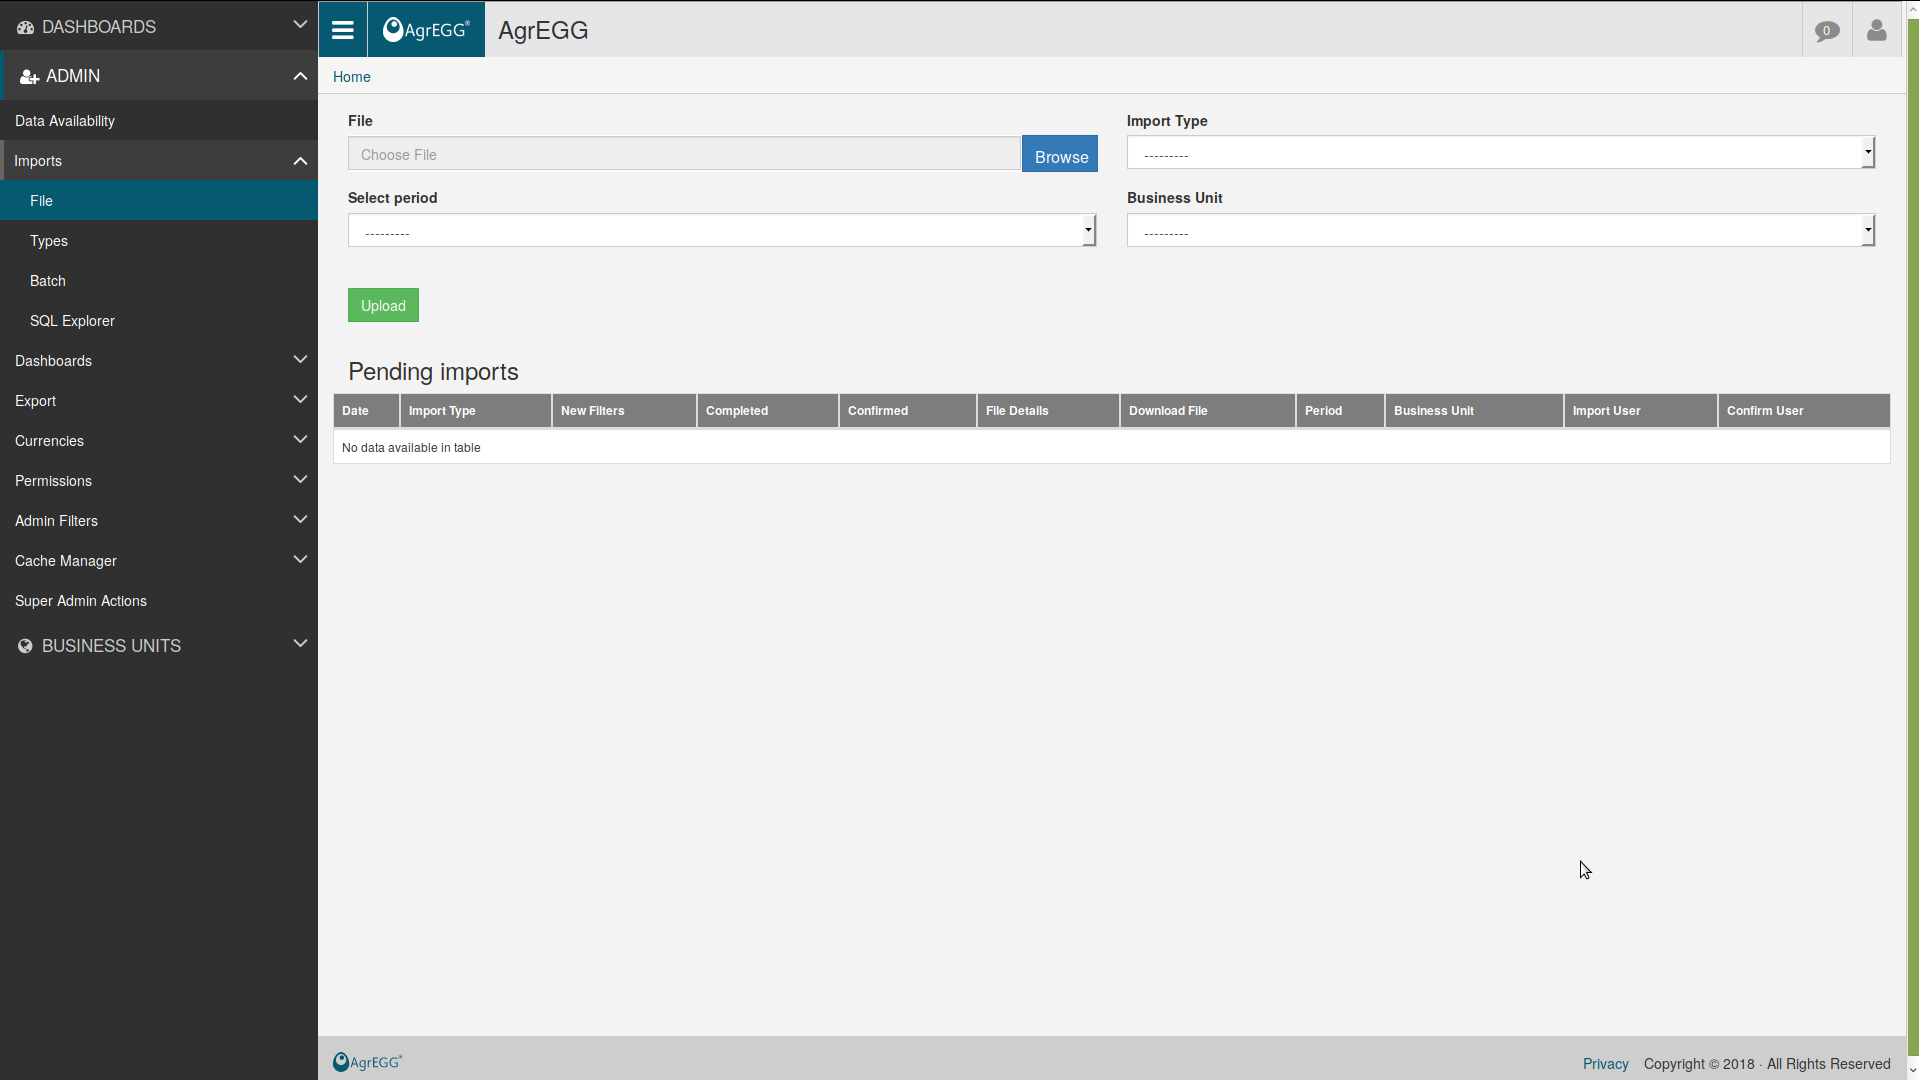
One can import an Excel file at a time from ADMIN->Imports->File in the left menu.
Select the Business Unit, period, import type, import data type, period frequency type, and optionally, the source (see below), then upload the file with “Browse”.
After loading the file, the system will check it. If everything is fine, it is then possible to confirm the import. Only at this point are the data inserted in the database.
In some projects, users may also be allowed to correct or extend imported data through the online editing workflow.
Period specifications
Apart from choosing a period to load the data, a couple of other options are present: “Import data type” and “Period frequency type”.
“Import data type” can be:
Single period: data are loaded for the selected period;
Year to date: data are considered as cumulated from the beginning of the year.
“Period frequency type” sets how often data are loaded to the system, and can be:
month
trimester
semester
year
but other frequencies can be set by the admin.
In addition, the “Source” field can be optionally set if multiple sources of data are available.
WARNING: If data for the same business unit, period, import type, import data type, period frequency type, and source are already present, they will be overwritten after the confirmation.
Batch Import
It is possible to define classes of files to be automatically imported into the system.
Those files must be put into media/batch_files. Their name must be in the form “period_label.extension”, e.g. “201801_test.csv”. Period must be in the form YYYYMM or YYYYMMDD and must correspond to an existing period, label can be an arbitrary string (no points allowed), extension must be csv, tsv, xls, or xlsx.
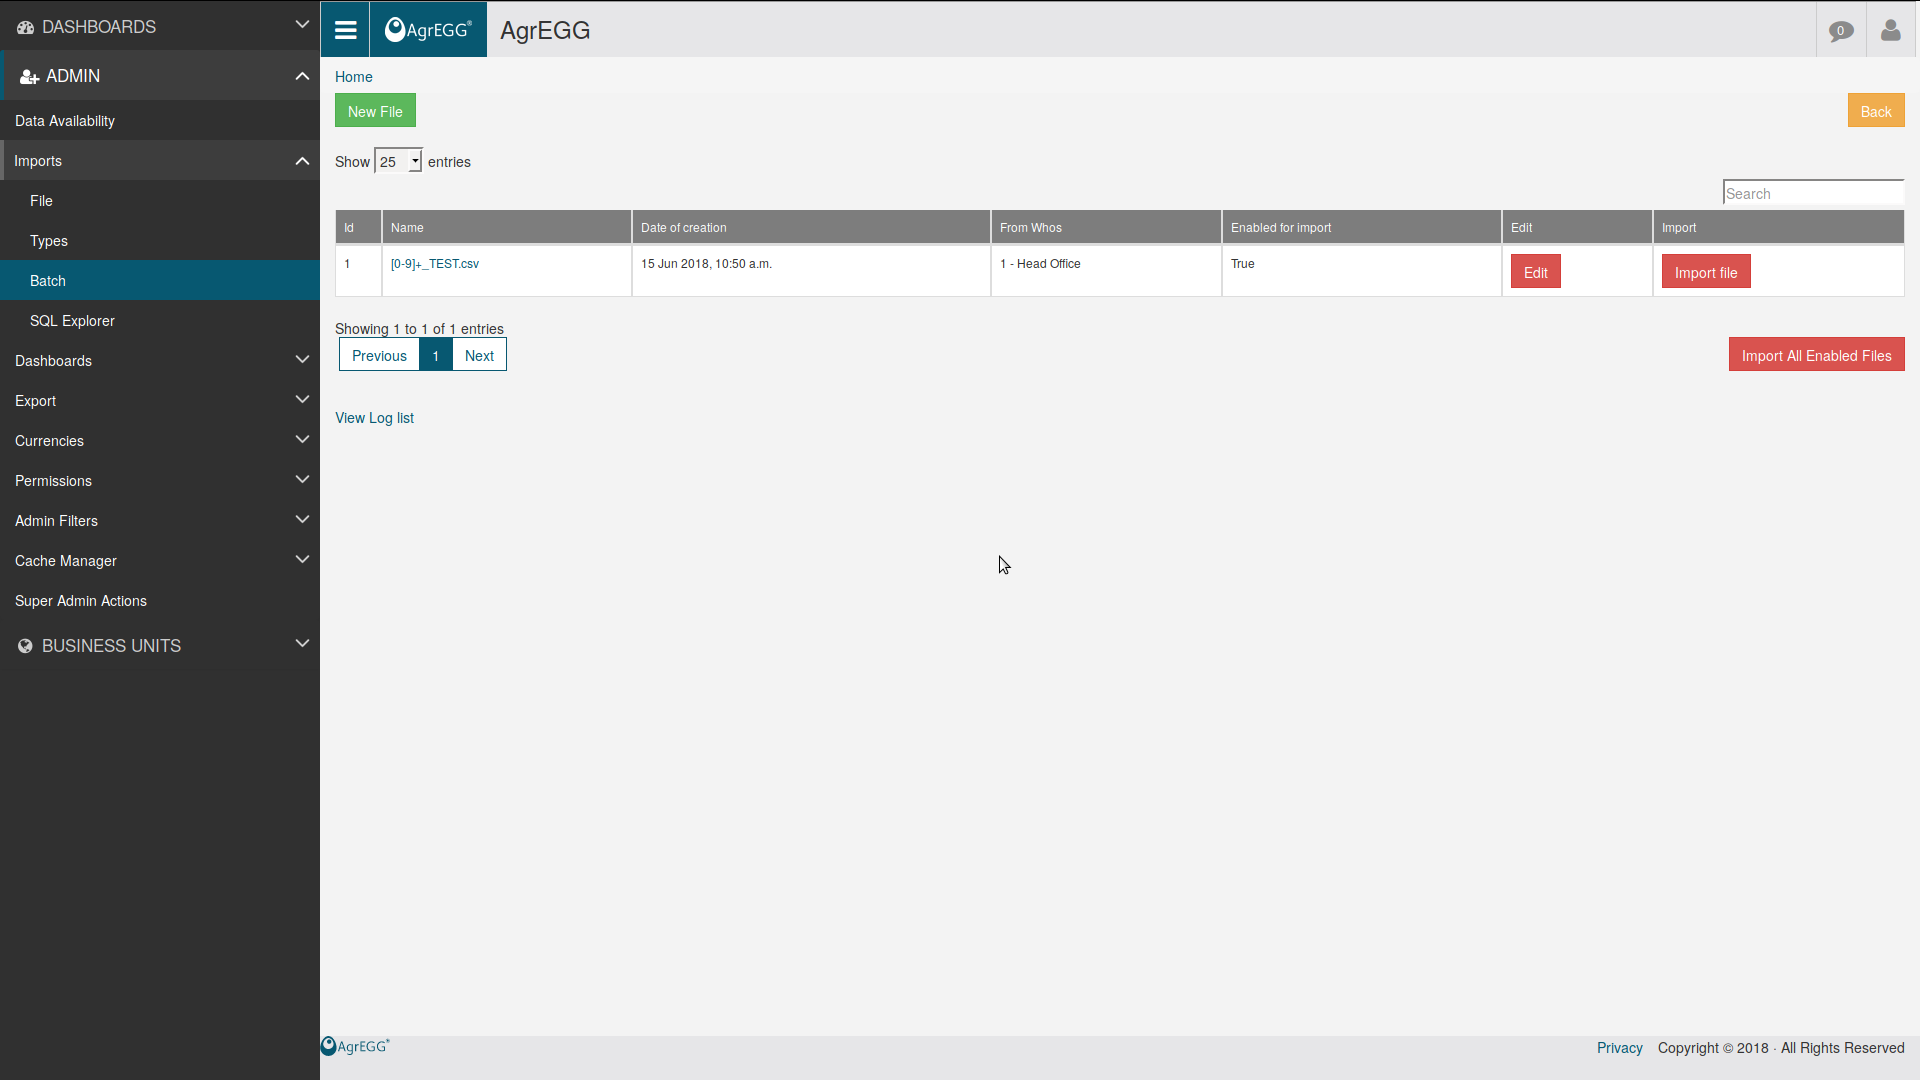
Go under Admin->Imports->Batch, and click on “New File”. A form appears, with the following fields:
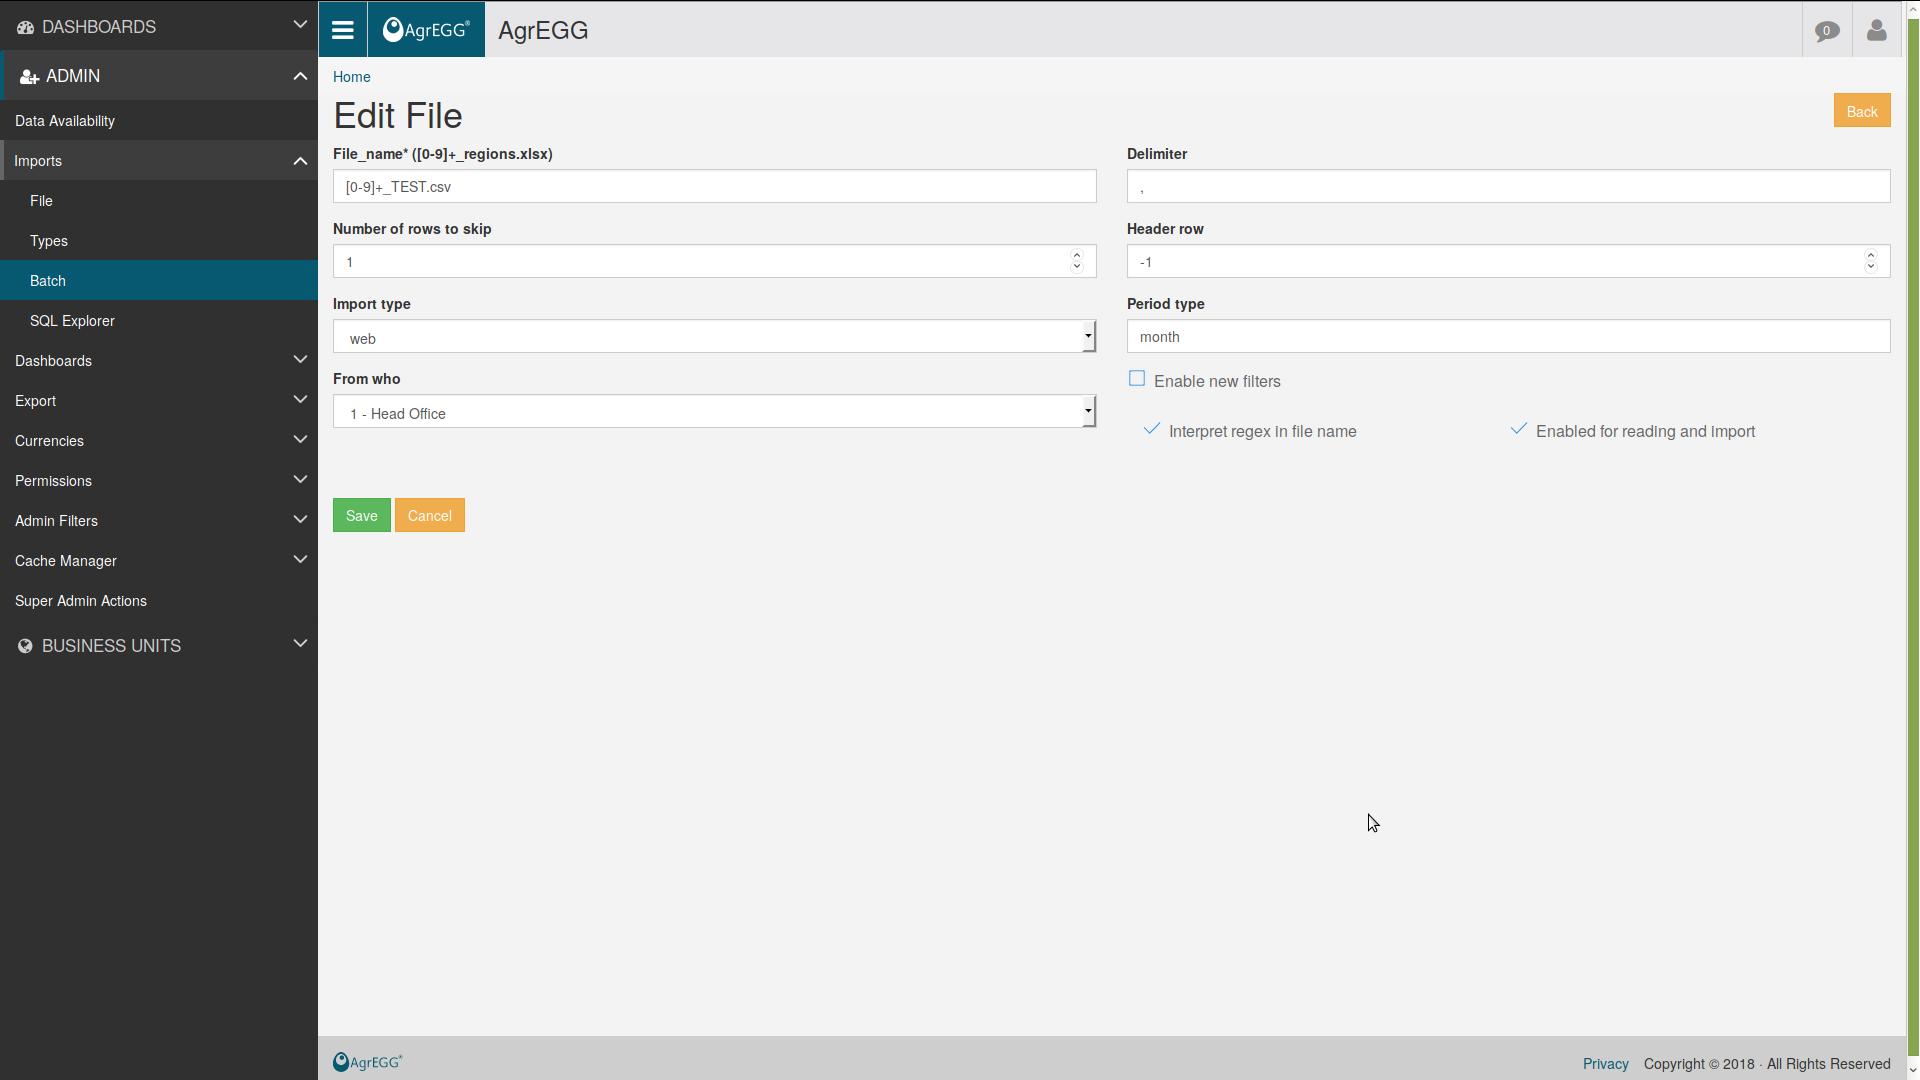
File Name: the name of the file
Interpret regex in file name: if checked, the file name is interpreted as a regex, and represents a group of files with the same file name structure. For example, [0-9]+_test.csv will read all the files with a group of numbers followed by “_test.csv”, so one can read all periods at the same time for the label “test”. If not checked, only the file with exactly the given file name will be read.
Delimiter: only for .csv files: the character separating columns. Default is comma “,”.
Number of rows to skip: number of rows which are skipped at the top, e.g. because they contain title, description, etc. Default is 1.
Header row: number of the header row, to extract column names, which are printed in the console (and then not used anymore). Default is -1 (don’t extract column names).
Import type: select one import type.
Period type: can be “monthly”; “quarterly”, “semiannually”, or “annually”, according to the frequency of data loading into the system.
From Who: select one Business Unit.
Enable new filters: allows the creation of new filter items.
Enabled for reading and import: if checked, file is considered when running “Import All Enabled Files”; if not, file is ignored.
Then, click on “Save”. A page with the details of the created class of files appears. Under “Queries that write on this file”, you will find SQL queries associated to this file. Under “Related logs” you will find all logs created when importing data from the defined file.
Click on “Import file” to look for files in the directory media/batch_files that correspond to the file name given in the form. You will be then redirected to the “All logs” page, where you can check the logs created in the process (one per file). According to the system settings, if the import is executed in a different thread, you will get the message: “Started import in a parallel thread, check logs for details.” Otherwise, a small summary of the process is printed.
WARNING: if no files are found, no log entries are produced!
In the main page, if you click “Import All Enabled Files”, all files with “Enabled for reading and import” checked will be imported. Once again, you will be redirected to the log page.
The same command is available via command line:
python manage.py import_batch_command
This is useful to schedule automatic imports via cron.
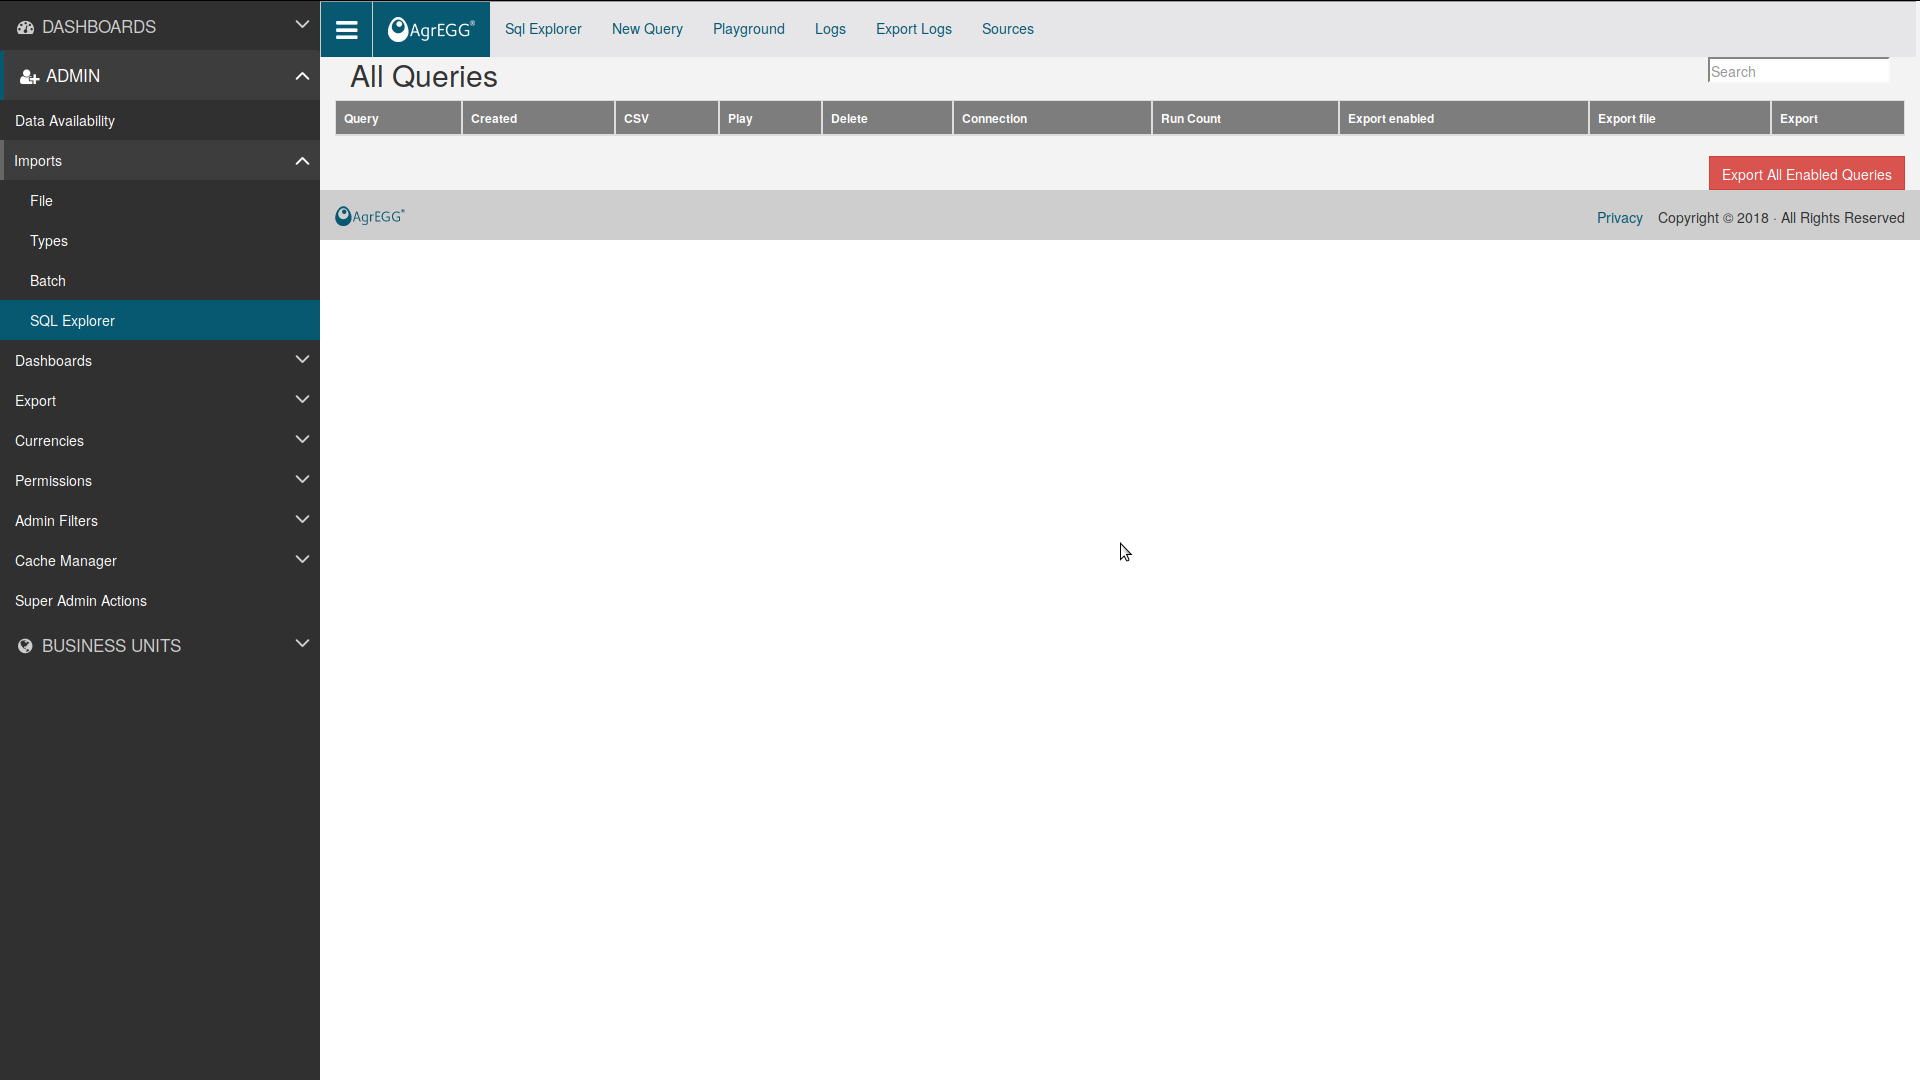
SQL Explorer
A simple interface to an external SQL database (DB) is provided via SQL explorer (https://github.com/groveco/django-sql-explorer). This allows to query a DB to extract datafiles to be successively imported via the Batch Import method.
Go to Admin->SQL Explorer.
In the top menu, select “Sources”. Insert the details of the desired DB in the form “Add Database Source”, then click “Save”. The new connection will appear under “Existing Database Sources”.
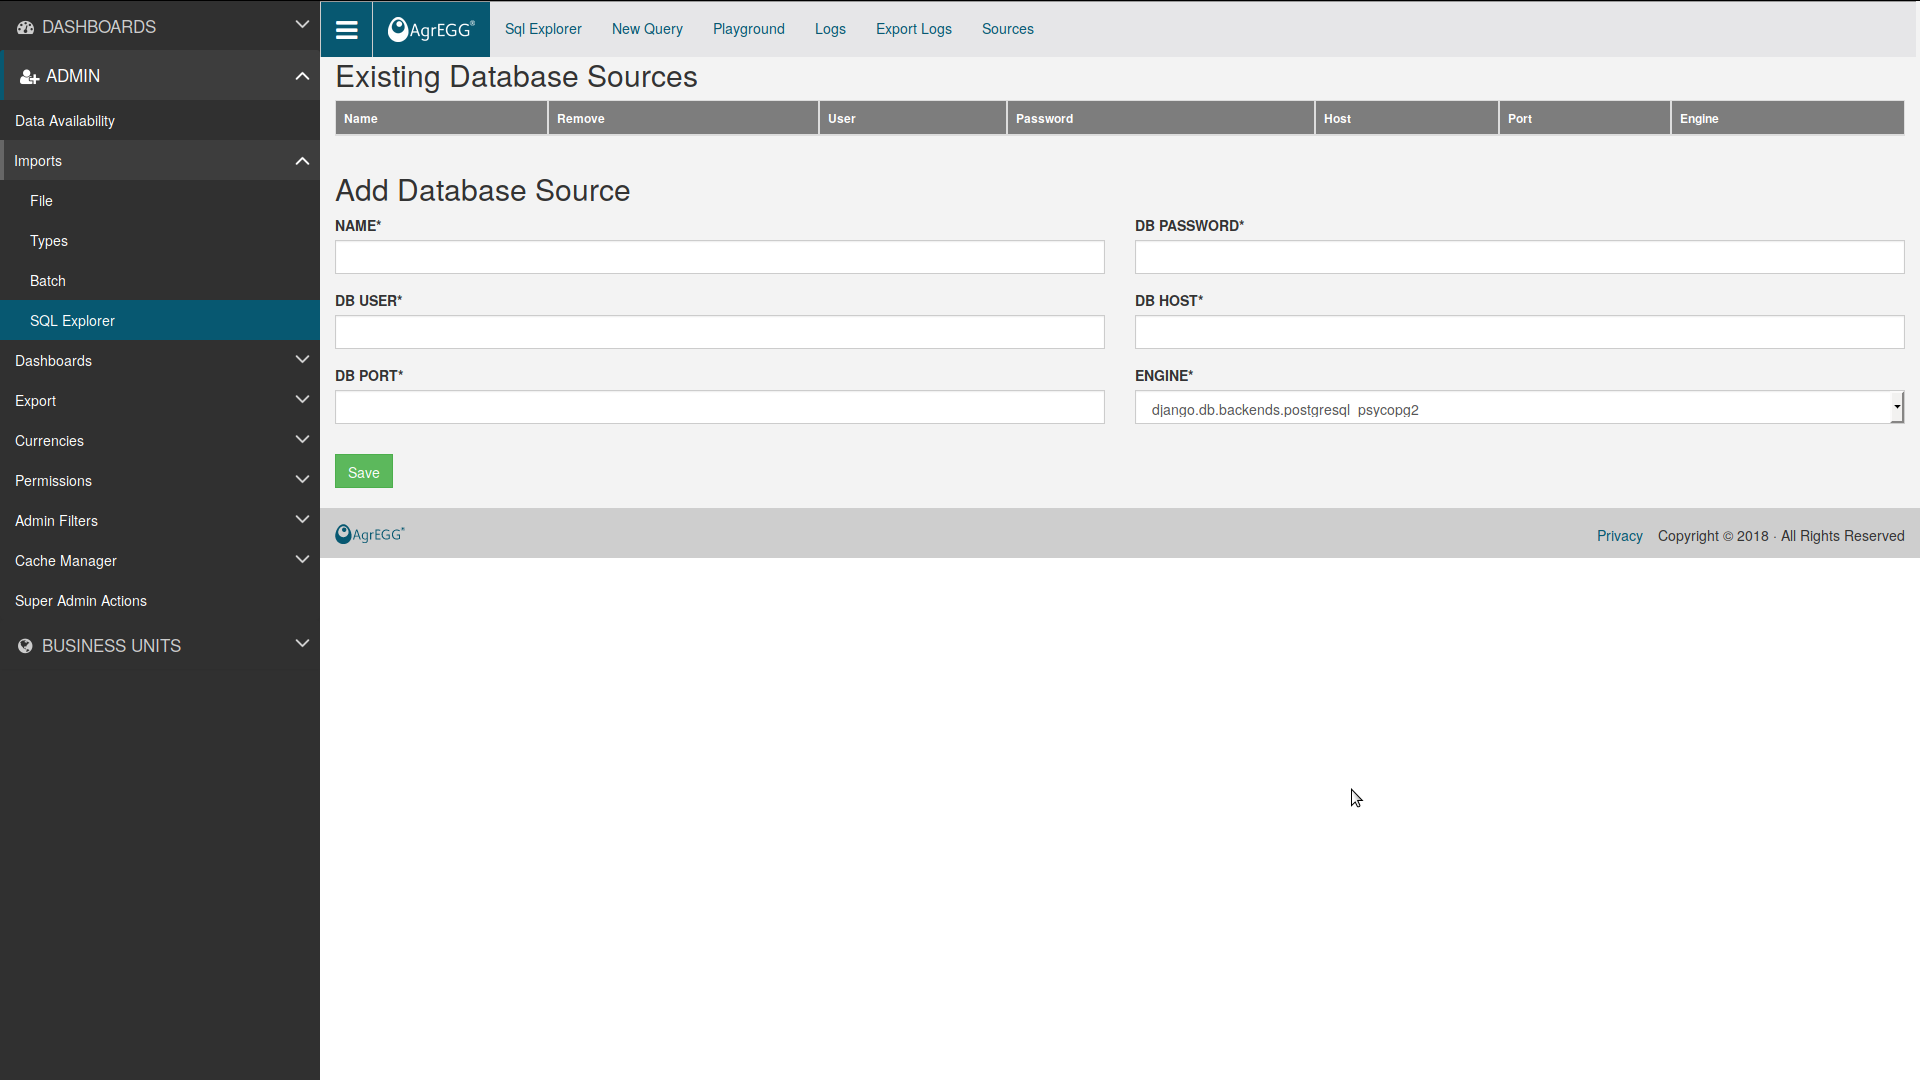
WARNING: you can only create and delete connections, not modify existing ones.
Should the process fail, add in DATABASES in settings_local.py the details of the external DB:
DATABASES = {
    'default': { #DON'T TOUCH THIS!
},
'external_DB': {
    'ENGINE': 'django.db.backends.postgresql_psycopg2', #for PSQL, otherwise change driver
    'NAME': 'external_DB',
    'USER': '...',
    'PASSWORD': '...',
    'HOST': '....', #e.g. localhost
    'PORT': '...',
    },
}
Then, add EXPLORER_CONNECTIONS in explorer/app_settings.py:
EXPLORER_CONNECTIONS = {
'external_DB': 'external_DB',
}
Once the connection to an external DB is setup, go under New Query and write any query you wish. If more than one external connection is setup, you can choose which one to use. Otherwise, the only one present will be used.
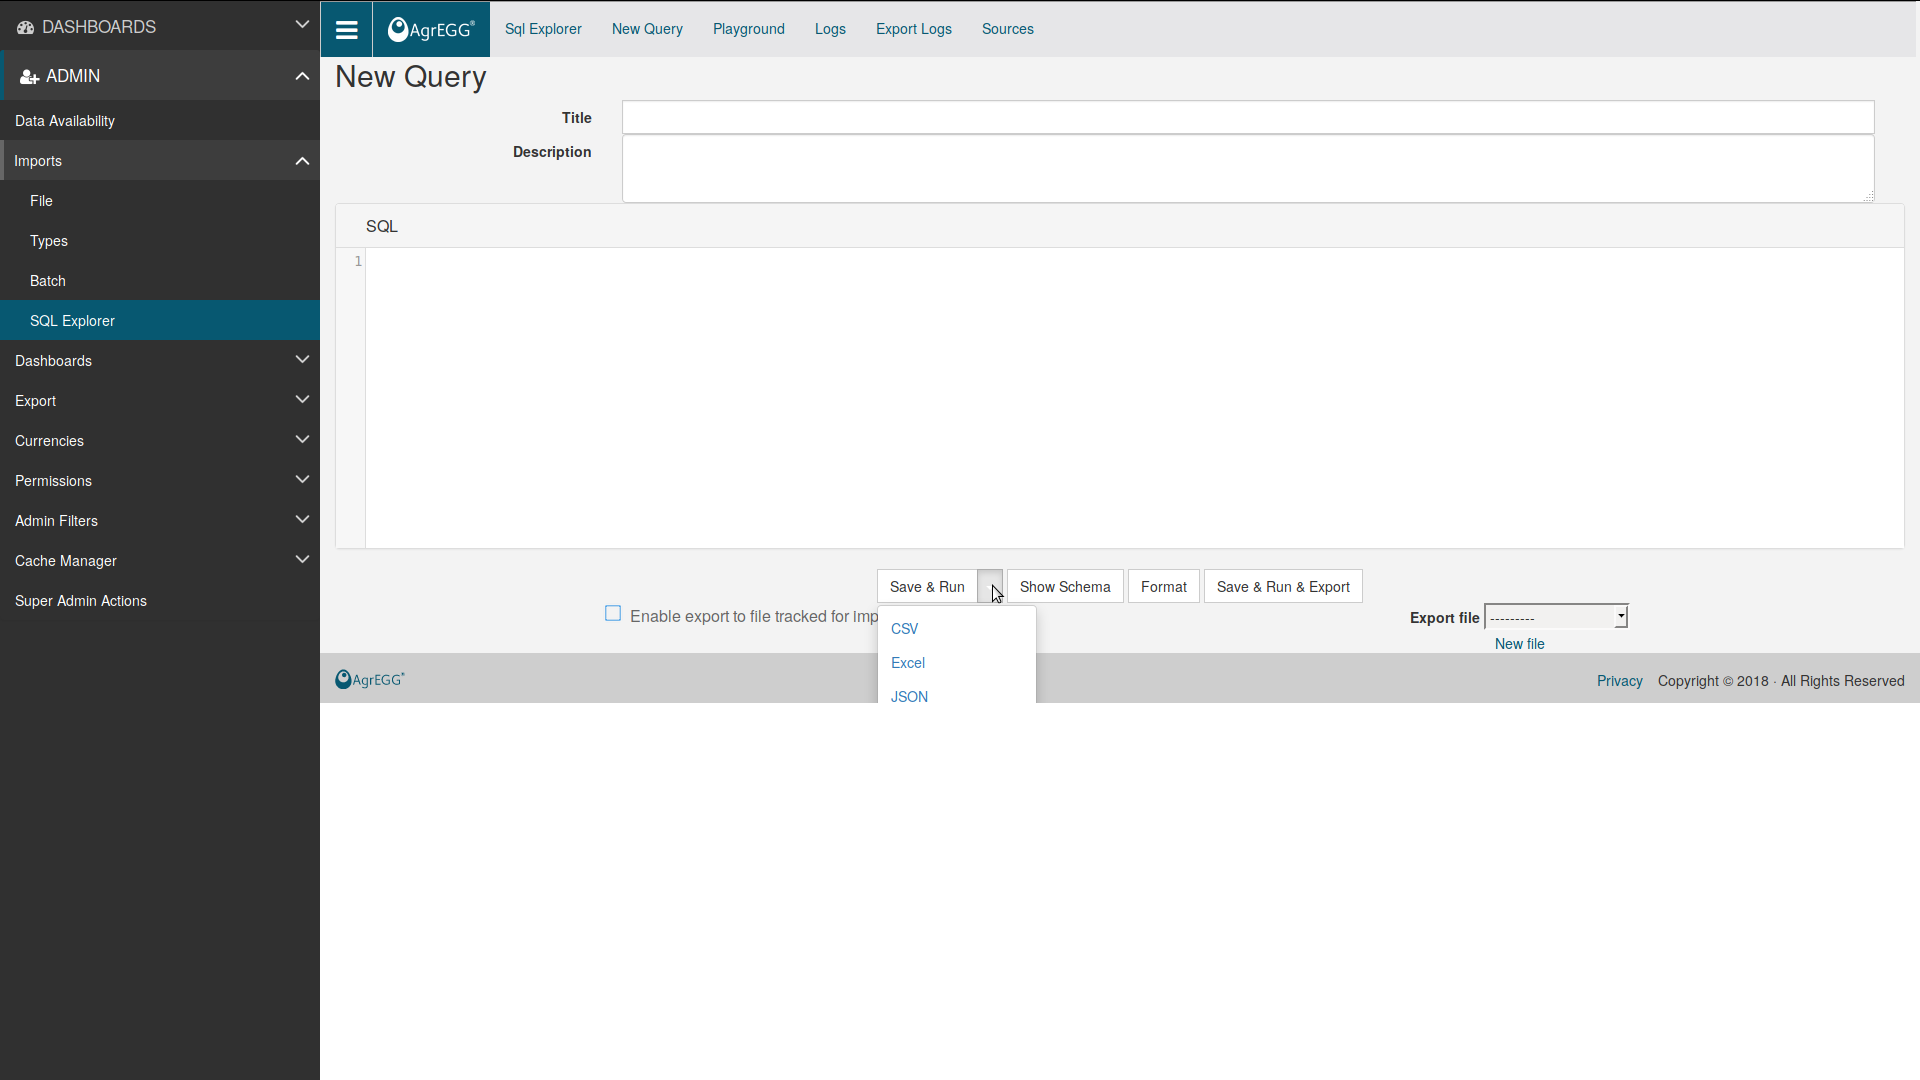
With the left-most button you can:
Save & Run: query is run and saved, so you can find it in the main menu of SQL Explorer;
Export to csv, xls or json: query is run, and result is exported into the desired file format;
Save only: query is saved but not run.
With the right-most button you can Save & Run & Export. To do this, you have to choose one batch import file under “Export file”, or create a new one. The query is run and written to the selected file, which is ready for a batch import.
WARNING: for this function to work, “Interpret regex in file name” must be unchecked, because you are going to write to a single file, and not to read from a class of files!
This function is also available in the main SQL Explorer menu, under “Export”. If you click “Export All Enabled Queries”, every query with “Enable export to file tracked for import” checked will be exported to its respective file.
The same command is available via command line:
python manage.py execute_queries_command
Like in the prevous Section, this is useful to schedule automatic exports via cron.
WebAPI Import
One can import data in the system via a WebAPI service. Since this is an advanced method, we refer to the admin guide for details.