Filters and Periods
Filters are used to select only a part of the data according to certain criteria.
They are shown in the right menu when seeing a dashboard.
Create a Filter
To create a filter, go under ADMIN->Admin Filters->Filters in the left menu.
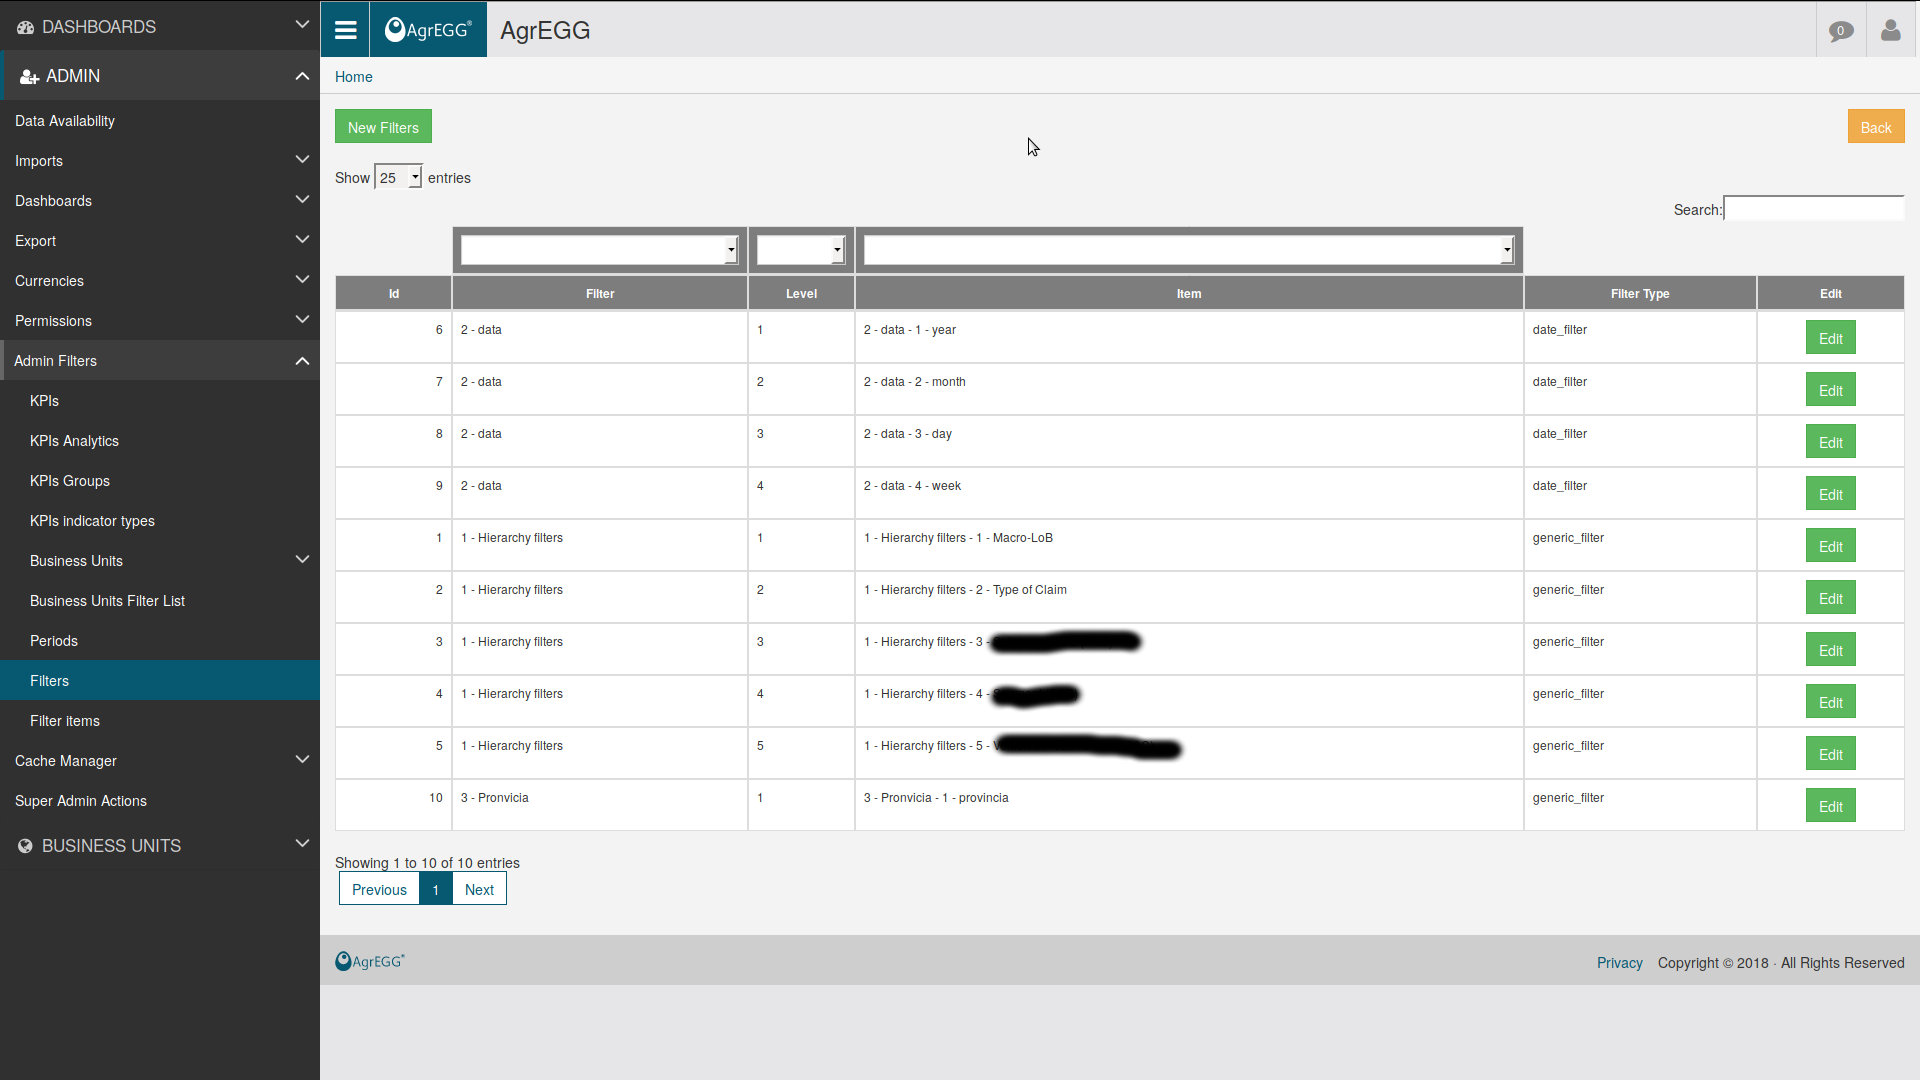
Click on “New Filters” to create a new filter, or “Edit” to edit an existing one.
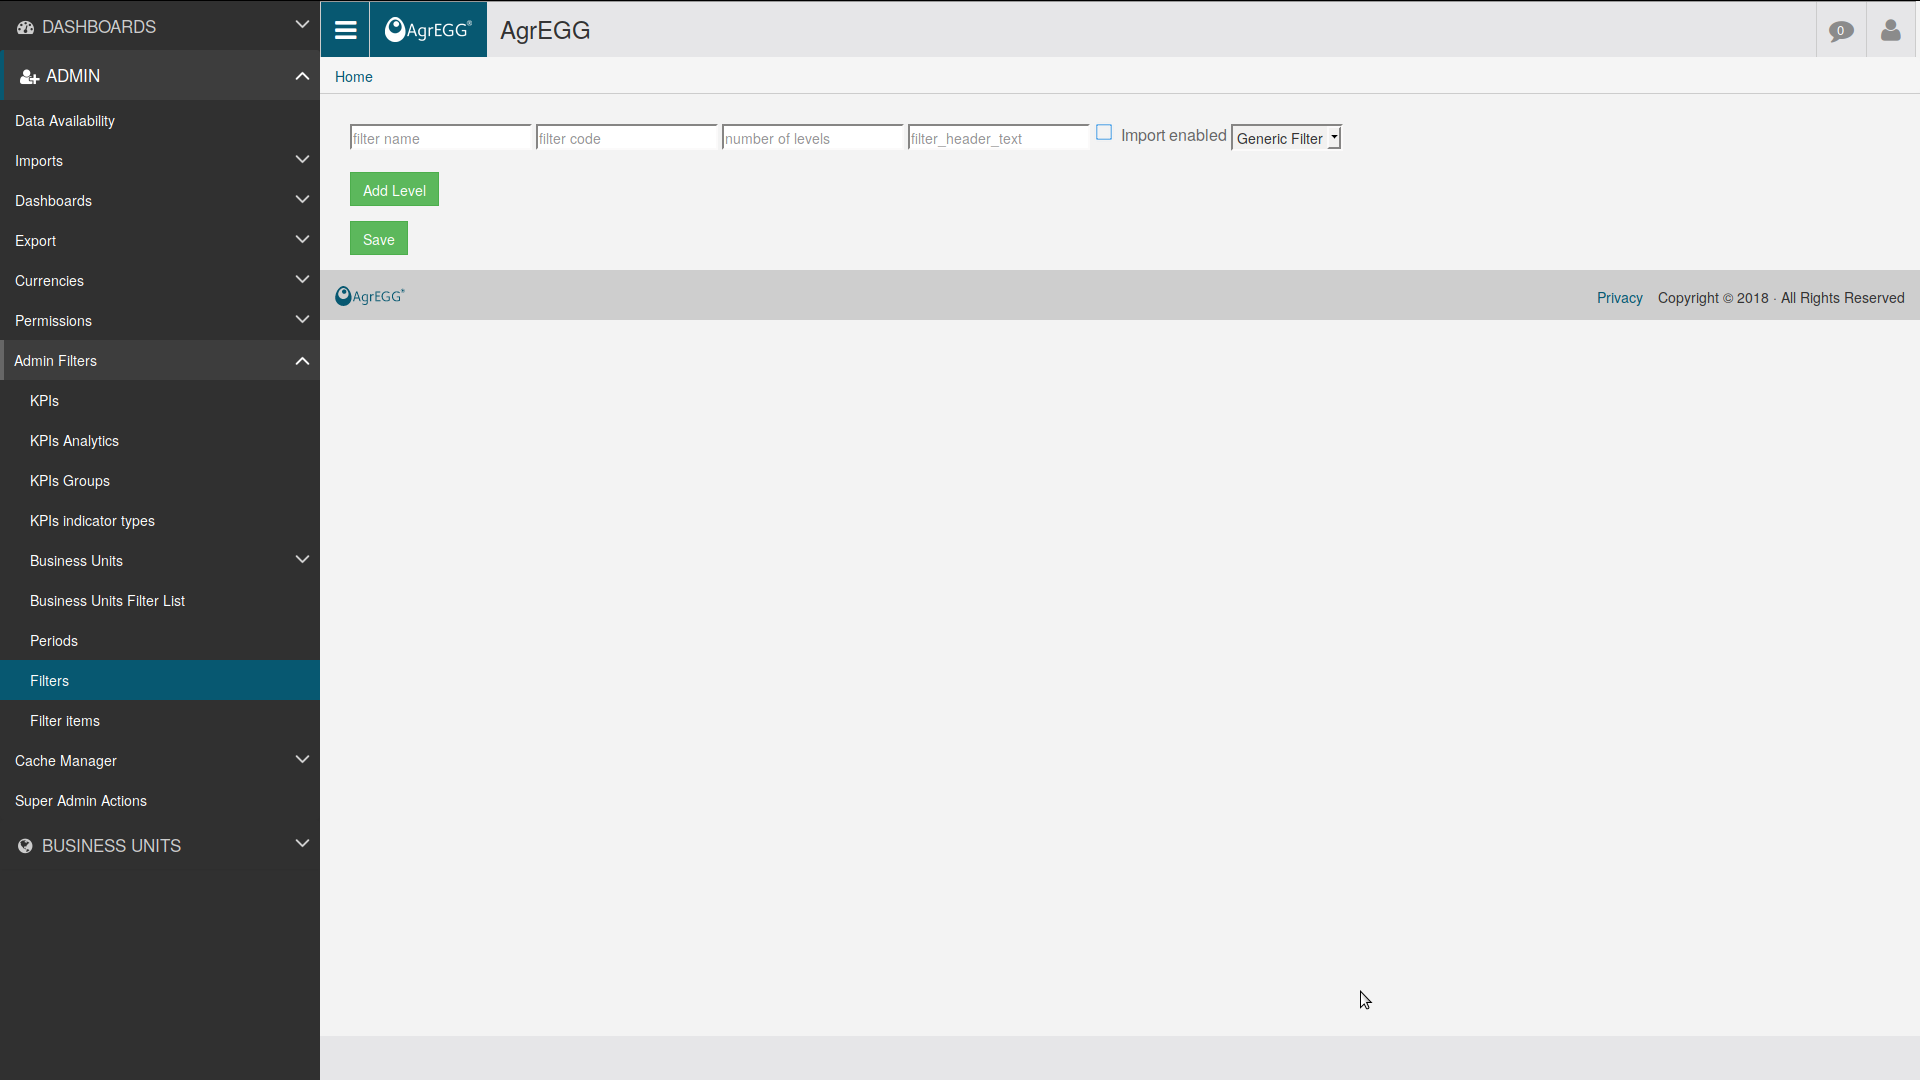
In the top row, enter the filter name, its code, the number of levels, and its header text. Check import enabled if you want the filter to be active, and select its type:
- “permission” if it is linked to user permissions,
- “date filter” if it is a date,
- “generic filter” otherwise.
The number of levels can be entered directly, or increased by one clicking on “Add Level”. For each level, enter its name and code.
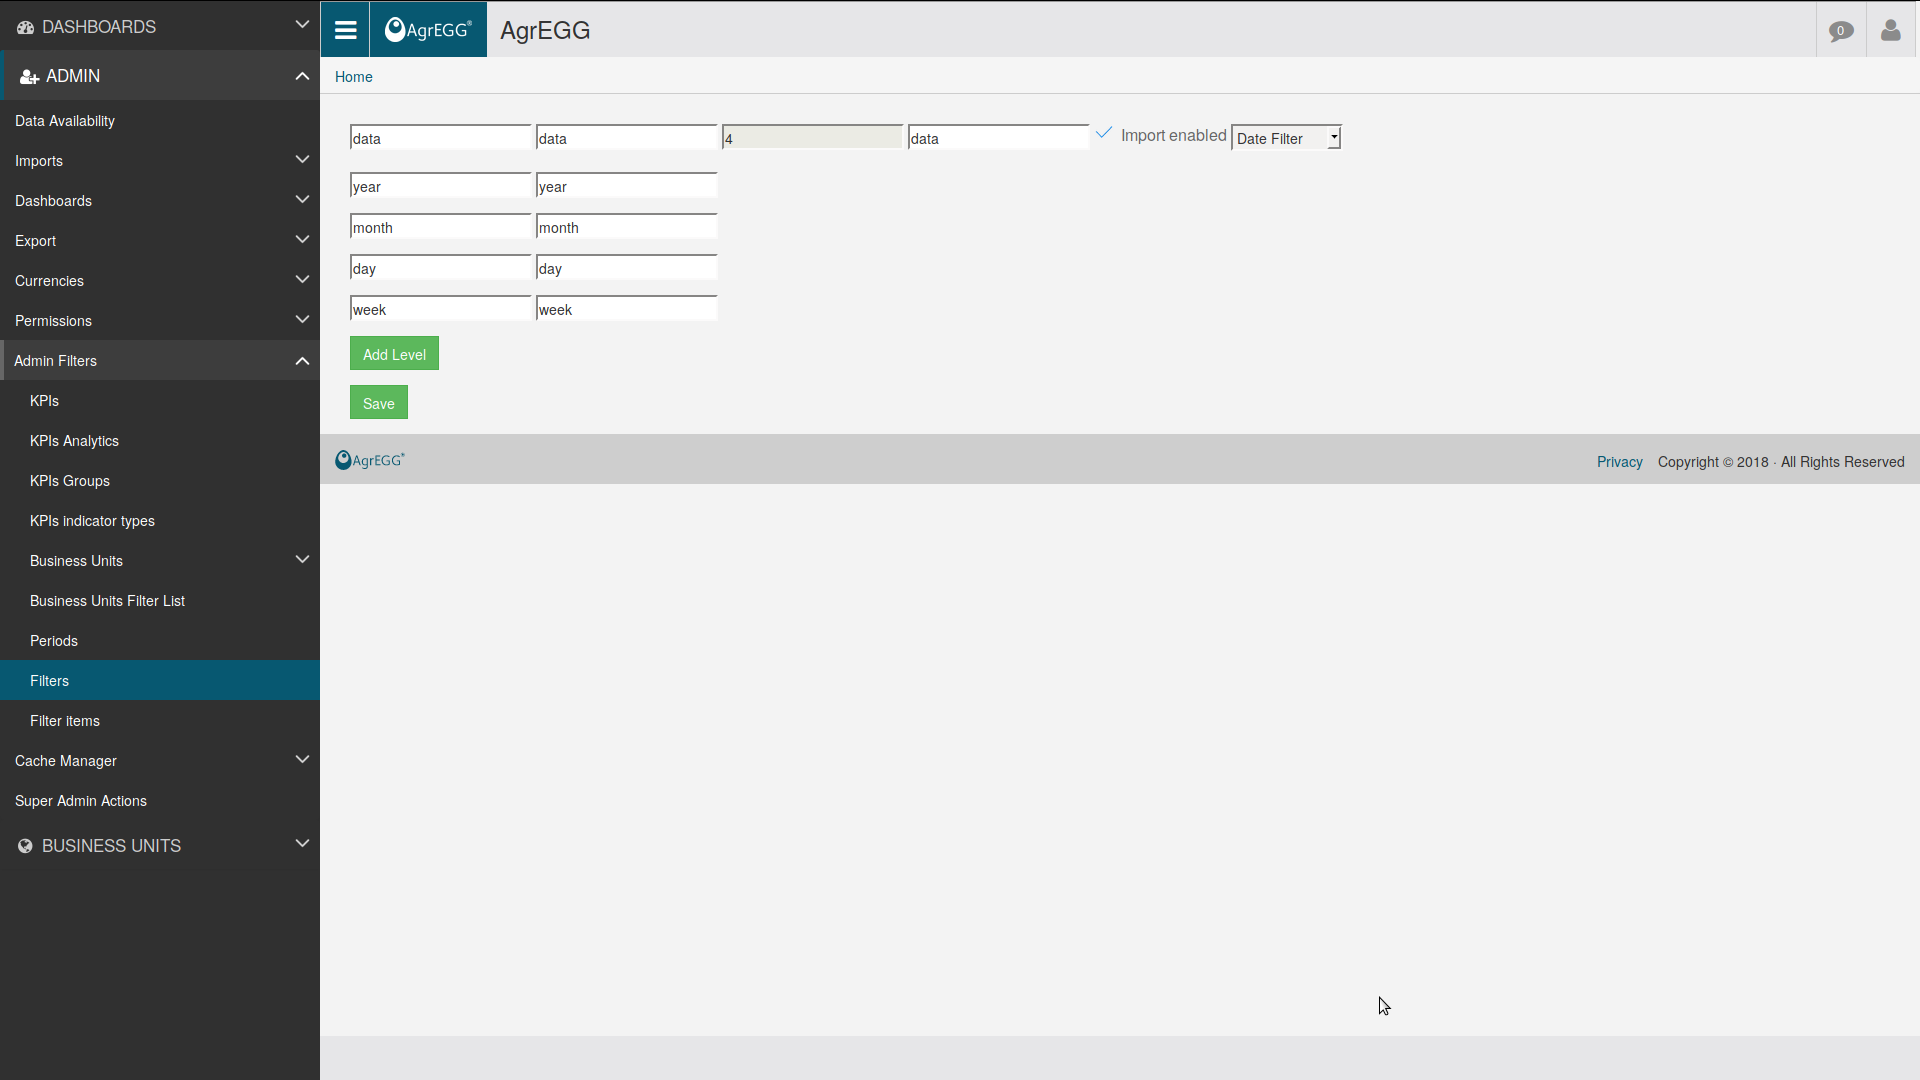
As an example, a geographical filter may have three levels, one for continent, one for country, and one for region.
A date filter, instead, has typically four levels:
- level 1 year (Short description YYYY)
- level 2 month (Short description YYYYMM)
- level 3 day (Short description YYYYMMDD)
- level 4 week
Create Filter Items
Filters are global classification schemes. In the previous example, we have a filter with three levels: continent, country, region.
Filter Items are the real categories into which data are classified: for example, under continent, we will have Europe, America, Asia, and so on; then, under Europe, we will have Italy, France, Germany, and so on.
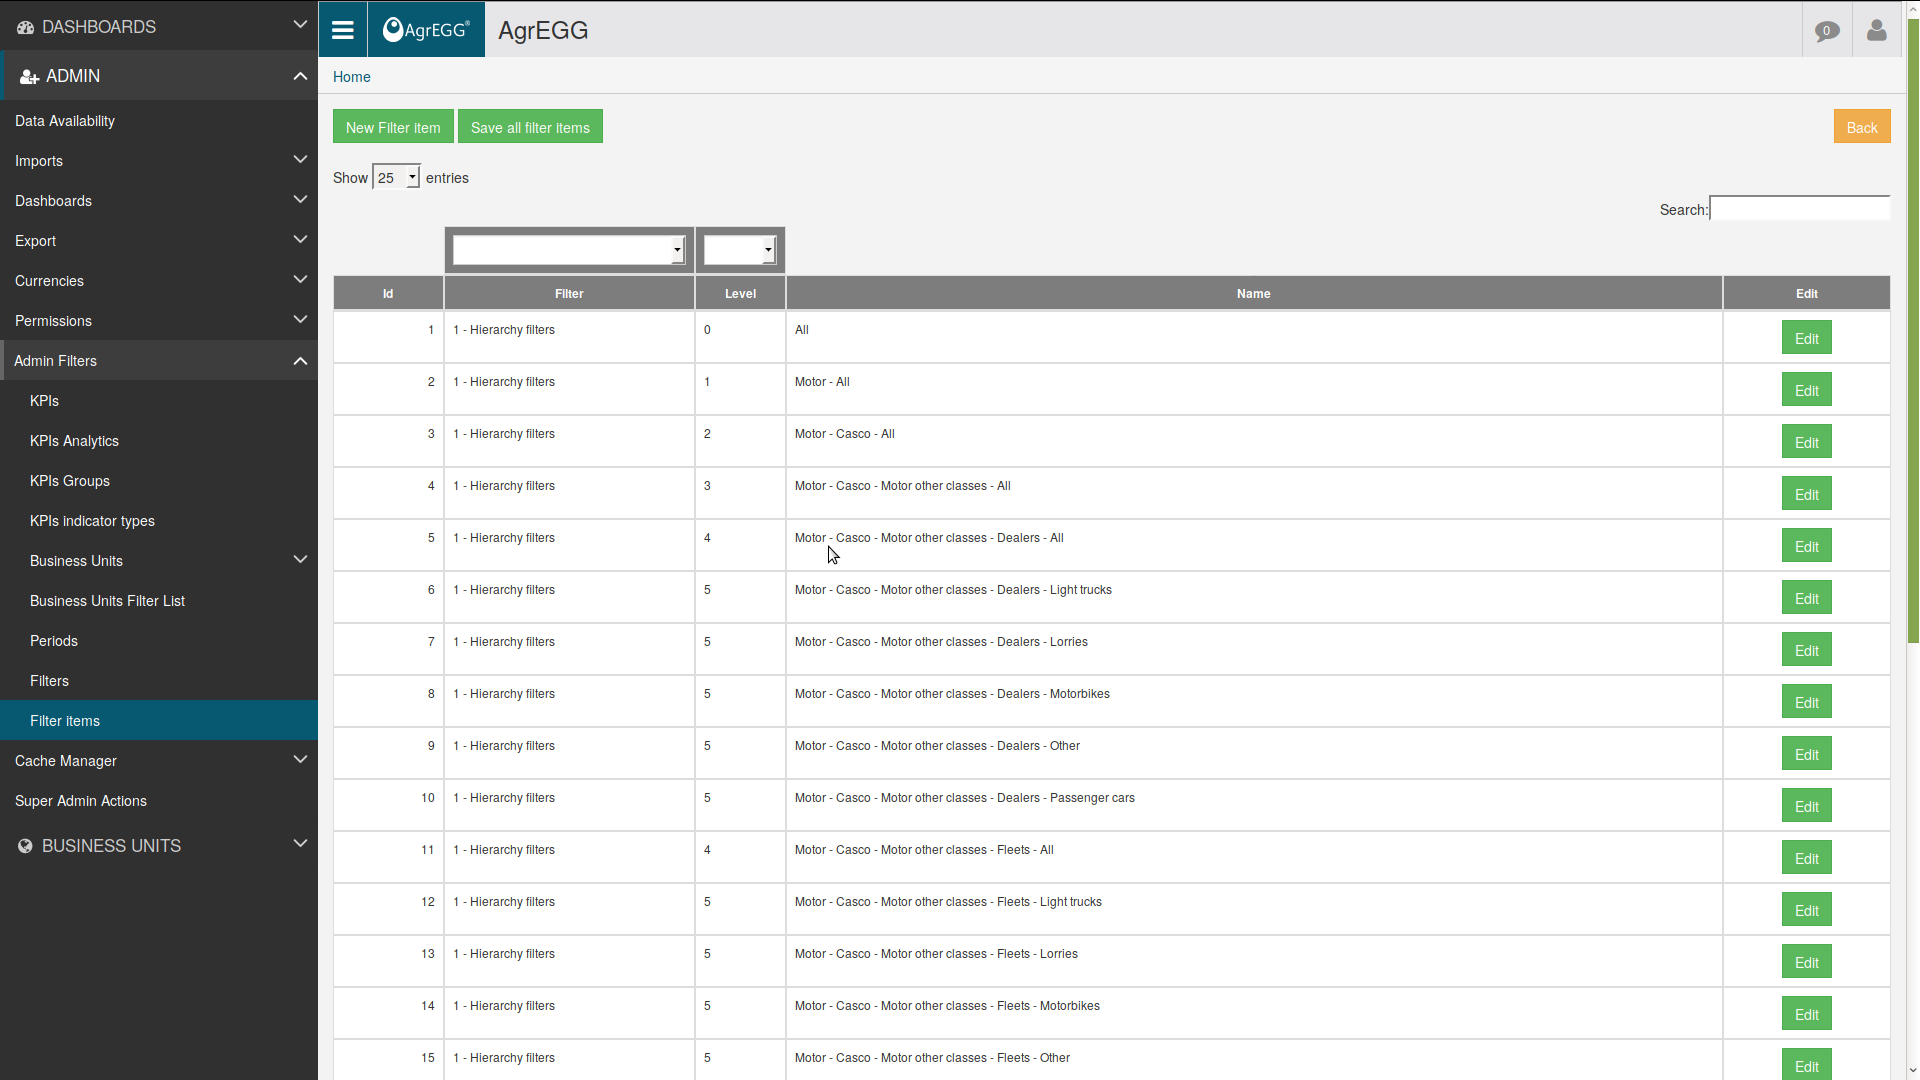
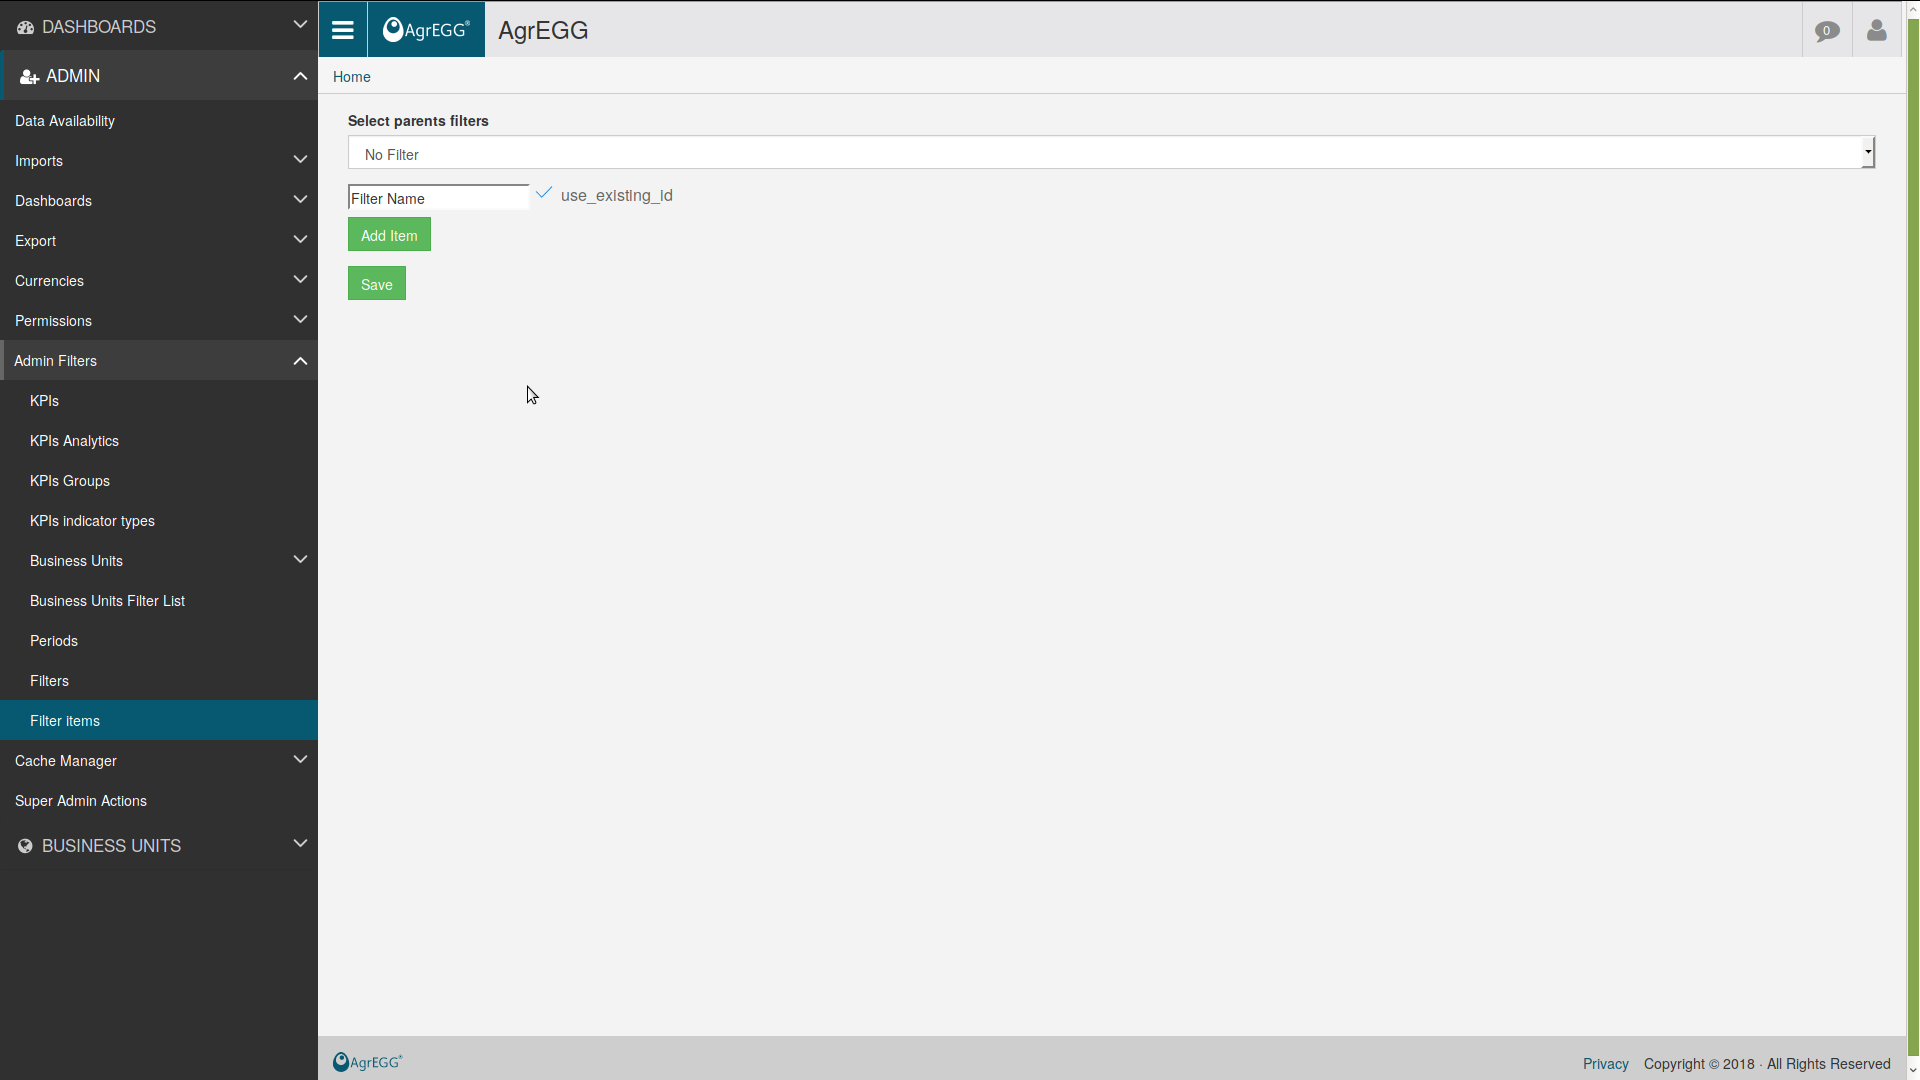
To create a Filter Item, go to ADMIN->Admin Filters->Filter Items, then select “New Filter Item”. Then choose the Filter to which it belongs (e.g. Continent), and give it a name (e.g. Europe). You can add more items simply by clicking “Add item”. Then click on “Save”.
After creating a Filter Item, one can click on “Edit” to change its properties. In particular, one can associate a color with it, or uncheck “Enabled” if the filter item has to be ignored.
It is not possible to create filter items if the filter is a “date filter”.
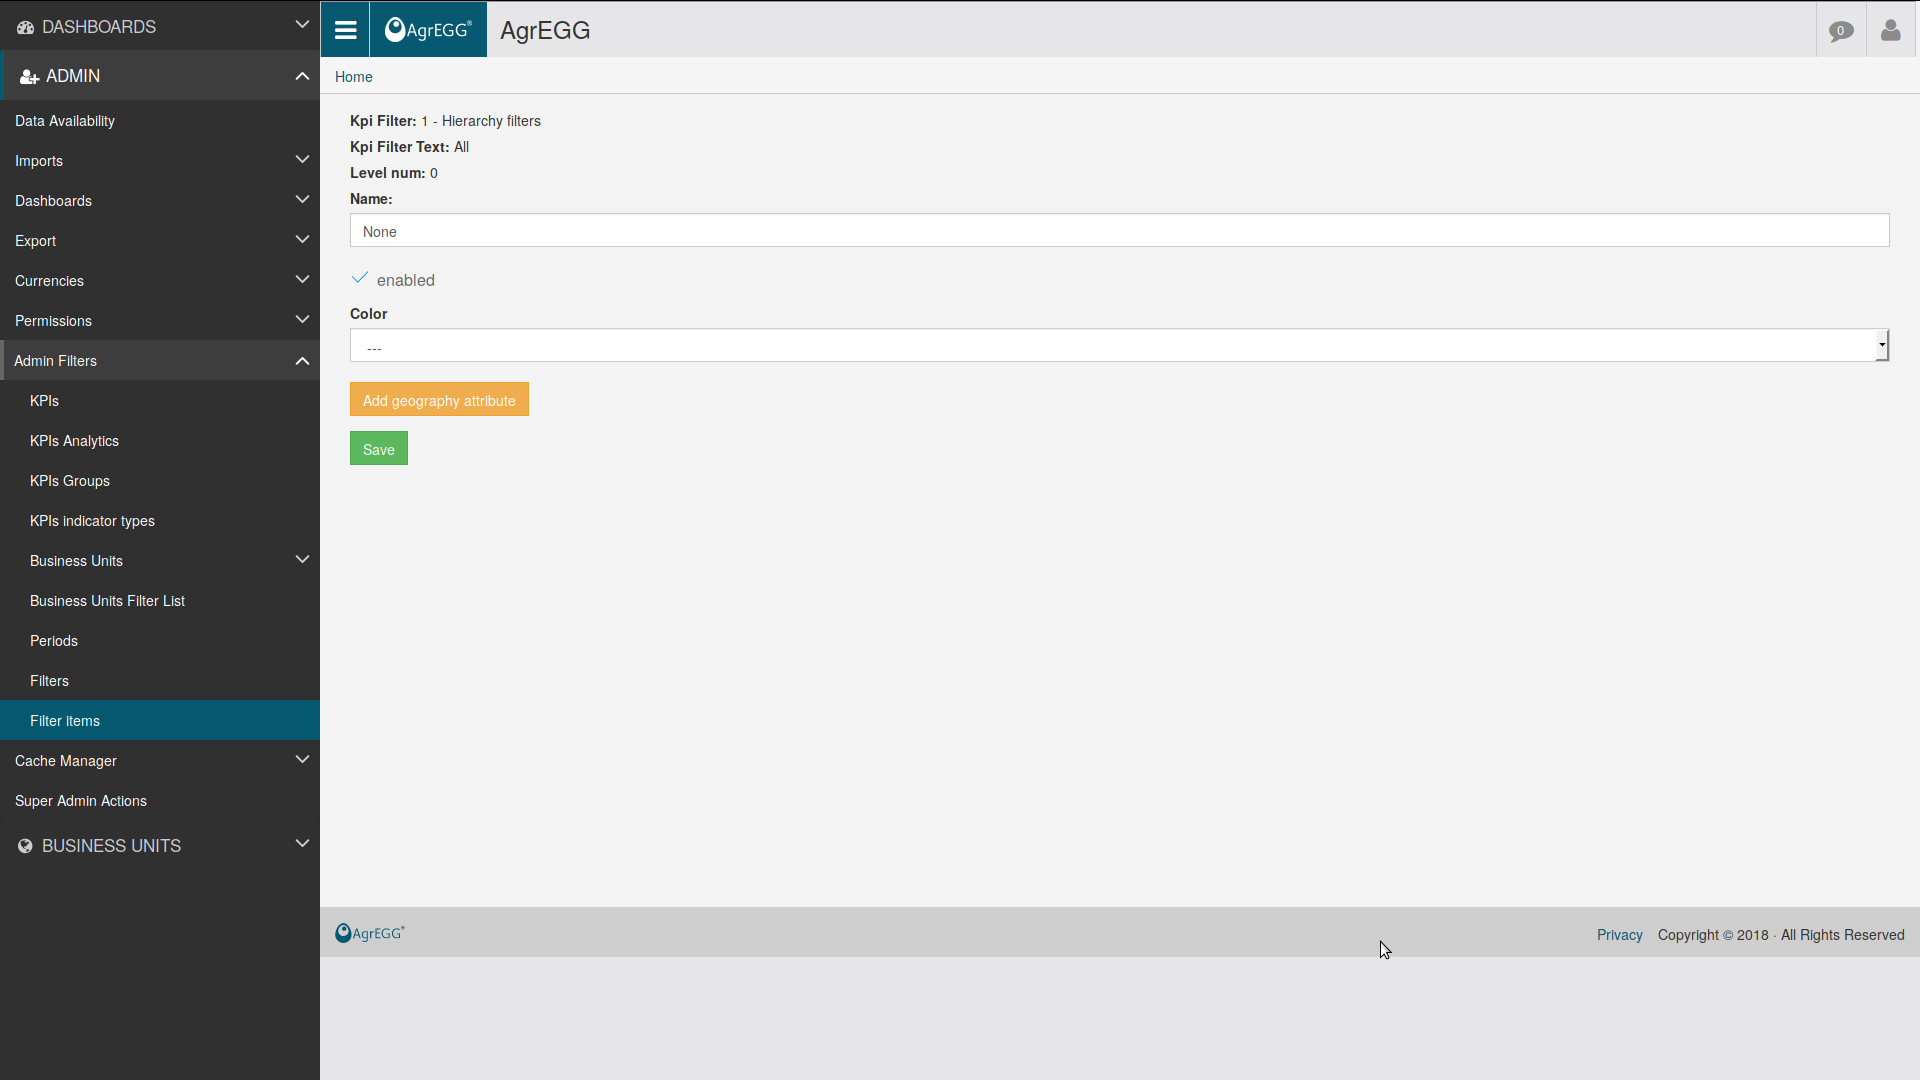
By clicking on “Add geography attribute”, it is possible to draw a poligon corresponding to a given region (though it is better to let an admin load a geoJSON file for it; see the admin guide).
Attributes
Filter items can be assigned attributes, i.e. properties that characterize them. This functionality is for the moment only available under /admin.
Attributes can be defined under 02. KPI Filters - 02. Filter Levels via “attribute_json”, e.g.:
[
    {
        "attribute_id": 1,
        "attribute_name": "External Rating Quality Step Code"
    },
    {
        "attribute_id": 2,
        "attribute_name": "External Rating Quality Step Description"
    }
]
and entered for each item under ->KPIS->02. KPI Filters - 03. Filter Items via “attribute_json”, e.g.:
{
    "level_item_31_attr_1": "6",
    "level_item_31_attr_version_1": [
        {
            "dt_end": 99999999,
            "dt_start": 0,
            "ver_text": "6"
        }
    ],
    "level_item_31_attr_2": "Credit quality step 6",
    "level_item_31_attr_version_2": [
        {
            "dt_end": 99999999,
            "dt_start": 0,
            "ver_text": "Credit quality step 6"
        }
    ],
    "level_item_32_attr_1": "SP",
    "level_item_32_attr_version_1": [
        {
            "dt_end": 99999999,
            "dt_start": 0,
            "ver_text": "SP"
        }
    ]
}
For every level of the filter the following fields are required:
- level_item_LEVEL_ID_attr_ID_ATTRIBUTE: contains the TEXT that defines the attribute value of the attribute with id ID_ATTRIBUTE and of the level with id LEVEL_ID
- level_item_LEVEL_ID_attr_version_ID_ATTRIBUTE: contains all historical variations with date start and date end.
For the meaning of fields like “level_item_31_attr_version_1”, see versioning.
Attributes can be exploited in query reports.
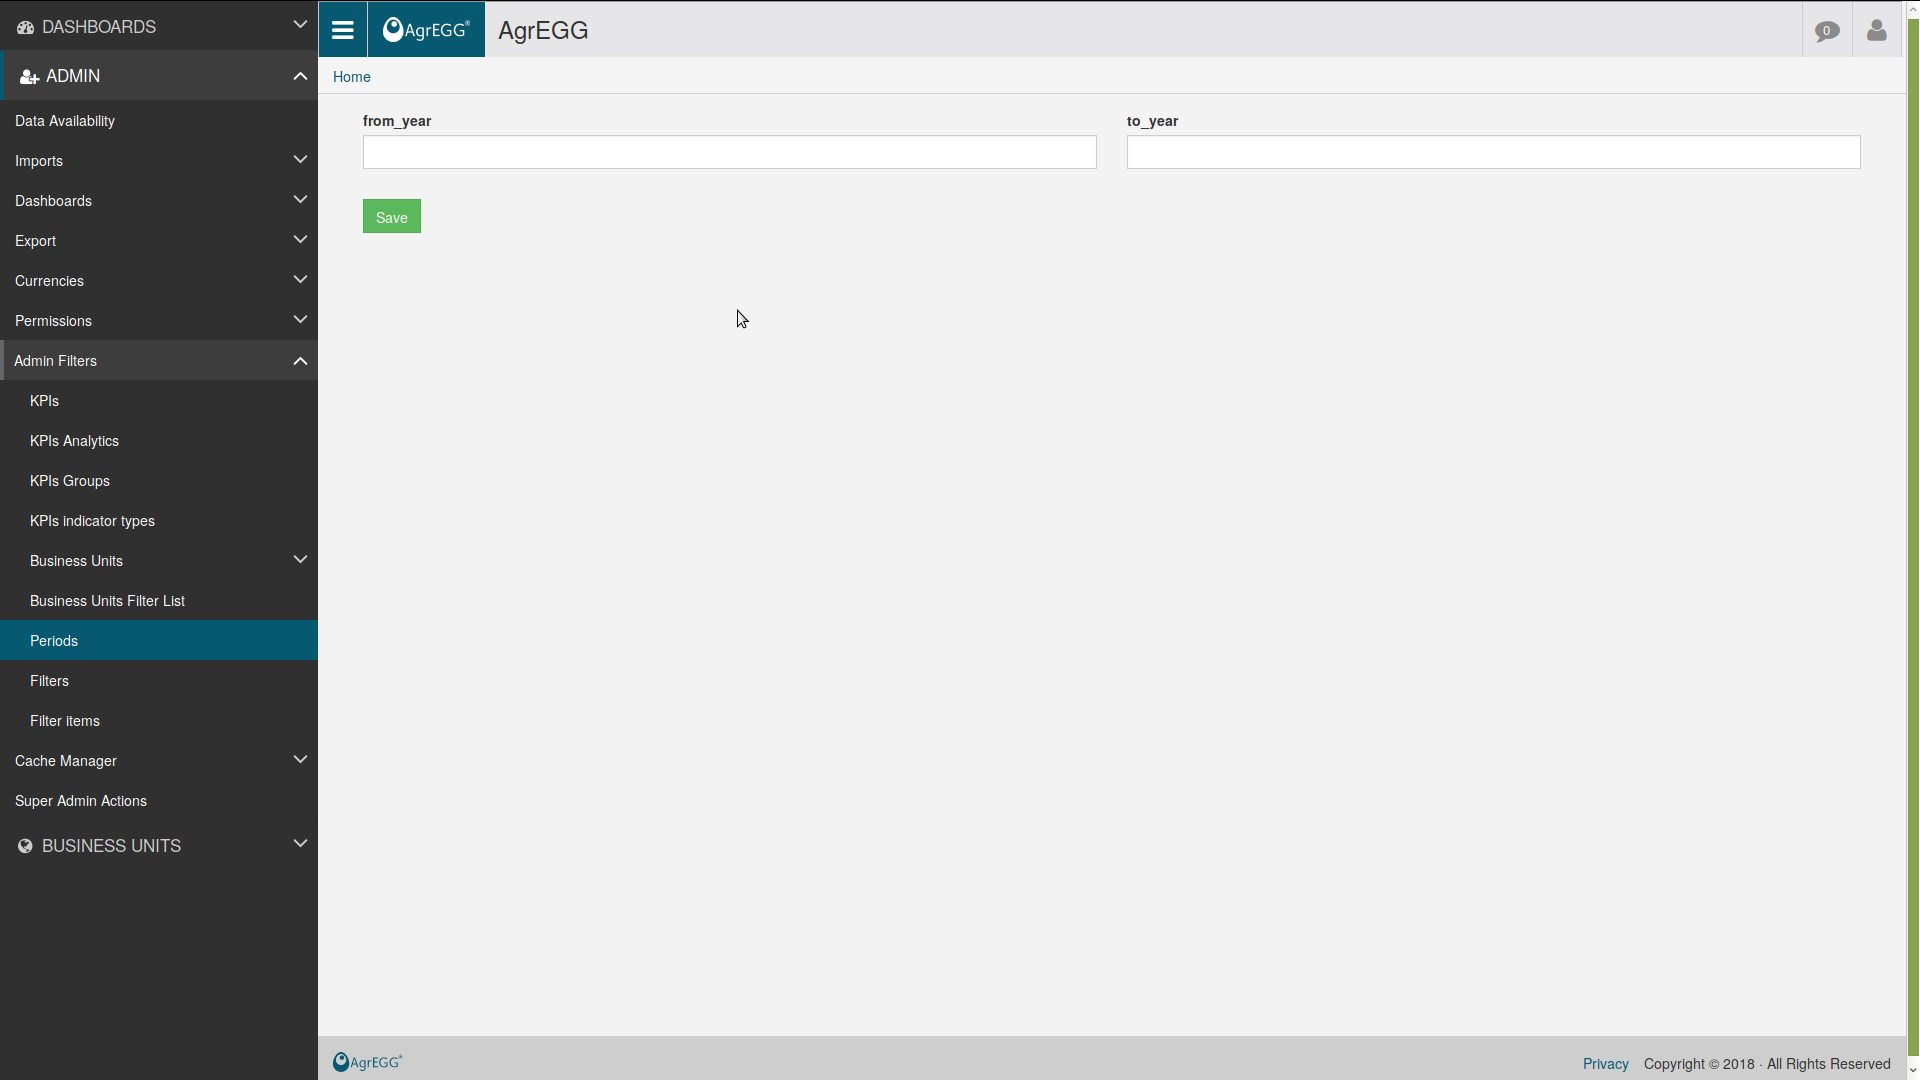
Periods
Periods are similar to filters. They are used to load data into the system.
WARNING: One cannot load data for a given period if the period has not been created through this procedure!
The standard configuration considers periods=months.
GO under ADMIN->Admin Filters->Periods.
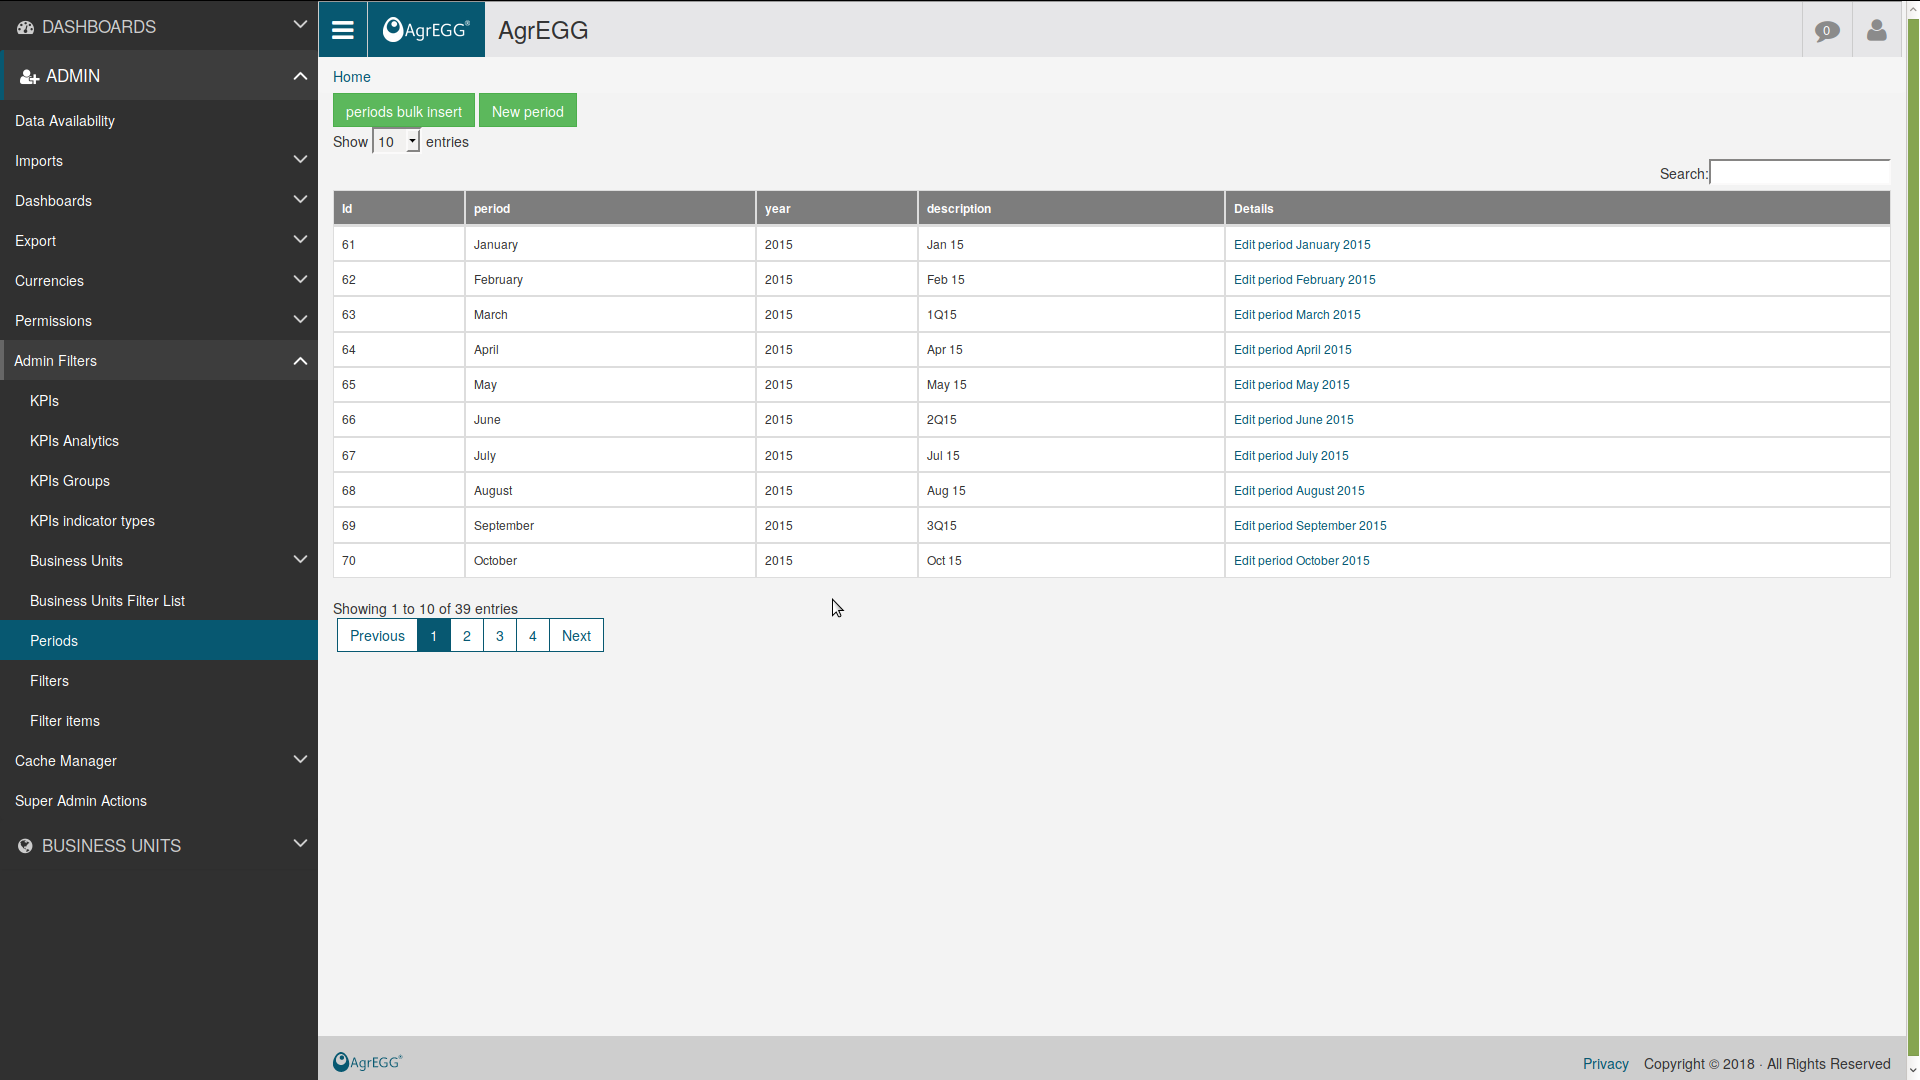
The easiest way is to click “periods bulk insert” and select initial and final year. Periods will be created automatically. Otherwise click “New period”, and enter details of the period.